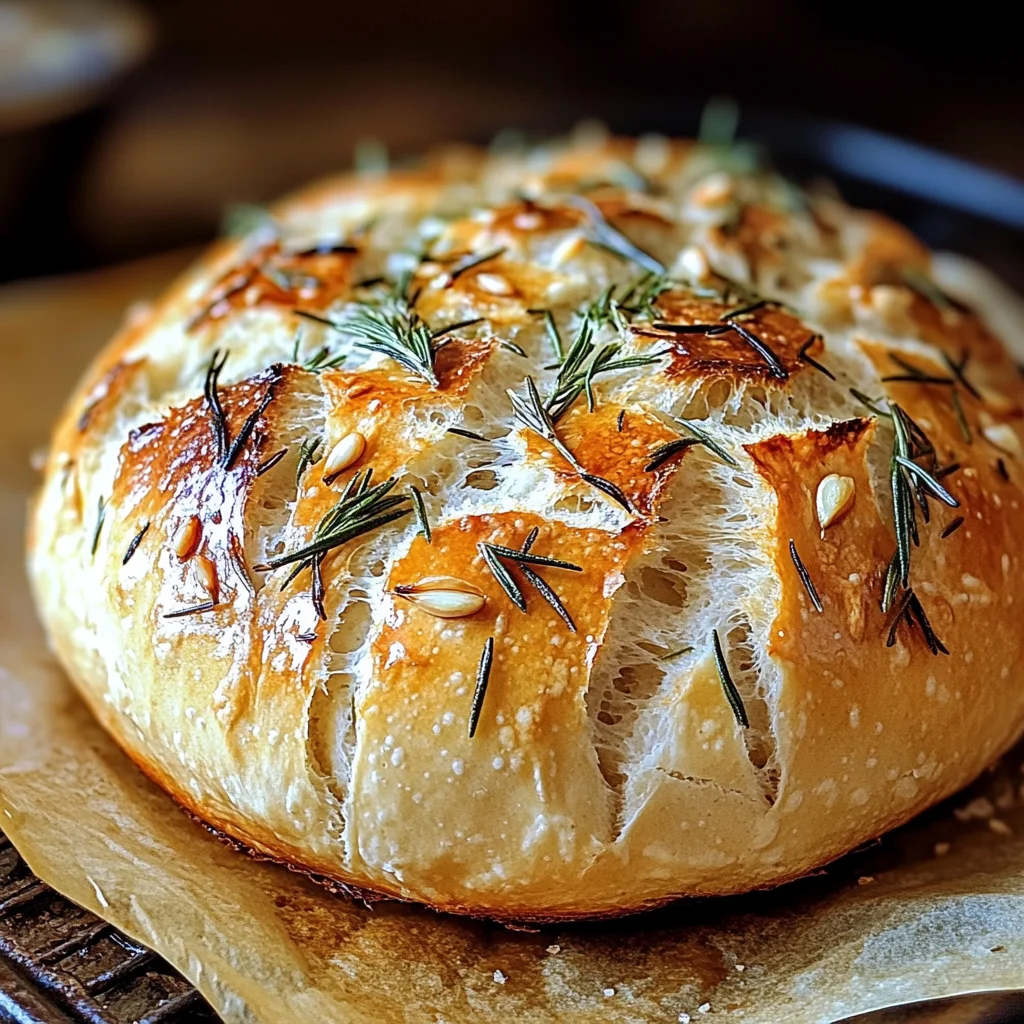
Easy Roasted Garlic Rosemary Artisan Bread – The Best Homemade Loaf
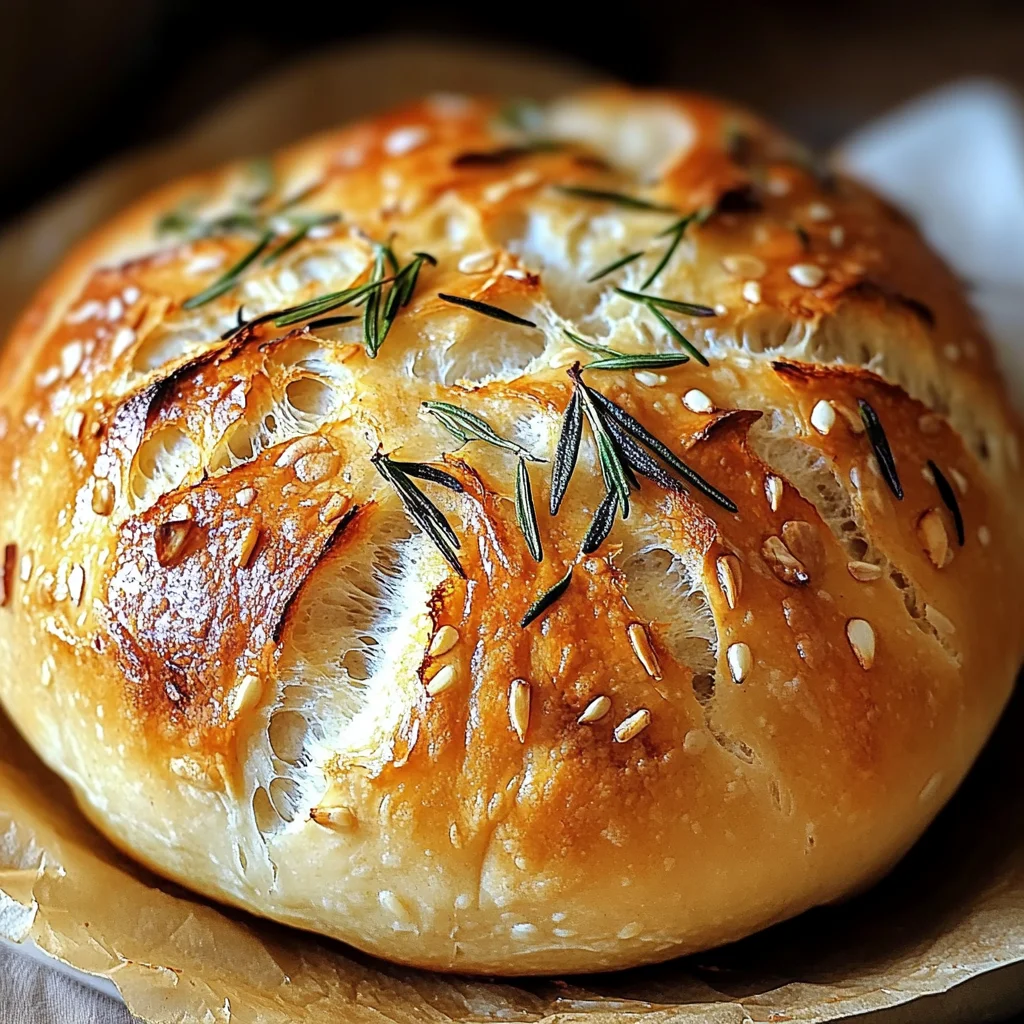
Easy Roasted Garlic Rosemary Artisan Bread – The Best Homemade Loaf is a delightful treat that can elevate any meal. This recipe is perfect for gatherings, family dinners, or just a cozy night in. With its crusty exterior and soft, chewy interior, this bread offers a burst of flavor from the roasted garlic and fresh rosemary. Plus, it’s incredibly easy to make, requiring no kneading at all!
Why You’ll Love This Recipe
- Simple Preparation: This artisan bread uses a no-knead method, making it accessible for bakers of all levels.
- Flavor Explosion: The combination of roasted garlic and rosemary creates an aromatic bread that pairs wonderfully with soups and salads.
- Versatile Uses: Serve it as a side dish, use it for sandwiches, or enjoy it on its own with butter.
- Long Rise Time: The lengthy fermentation process enhances flavor without extra effort on your part.
- Perfectly Rustic: Its homemade look adds charm to your dining table and impresses guests.
Tools and Preparation
To make Easy Roasted Garlic Rosemary Artisan Bread – The Best Homemade Loaf, you’ll need a few essential tools to ensure success in your baking adventure.
Essential Tools and Equipment
- Dutch oven
- Mixing bowls
- Spatula
- Parchment paper
- Clean towel
Importance of Each Tool
- Dutch oven: Provides even heat distribution for crusty bread that rises beautifully.
- Mixing bowls: Necessary for combining ingredients and allowing dough to rise.
- Spatula: Helps mix the sticky dough effectively without making a mess.
- Parchment paper: Prevents sticking and makes transferring the dough easier.
Ingredients
Easy Roasted Garlic Rosemary Artisan Bread is crusty, chewy, and loaded with flavor. Make the perfect homemade loaf with this no-knead, rustic recipe.
For the Bread Dough:
- 1 whole head garlic
- 1 tablespoon extra-virgin olive oil (divided)
- Coarse sea salt & freshly ground black pepper
- 1½ cups water (room temperature, ~70°F / 21°C)
- 1 teaspoon active dry yeast
- 3 cups bread or all-purpose flour (plus more for dusting)
- ½ teaspoon dried oregano
- 1 teaspoon kosher or fine sea salt
- 2 teaspoons finely chopped fresh rosemary (plus more for topping)
- 1 head roasted garlic cloves (smashed)
How to Make Easy Roasted Garlic Rosemary Artisan Bread – The Best Homemade Loaf
Step 1: Roast the Garlic
- Preheat oven to 400°F (204°C).
- Cut the garlic head in half.
- Drizzle exposed cloves with olive oil and sprinkle with salt and pepper.
- Wrap in foil and roast for 40 minutes.
- Allow to cool before removing cloves from skins.
Step 2: Mix the Dough
- In a small bowl, dissolve yeast in room-temp water and let sit for 10–15 minutes.
- In a large bowl, combine flour, salt, oregano, and rosemary.
- Add yeast water, roasted garlic cloves, and olive oil to the dry ingredients.
- Mix with a spatula until you achieve a sticky dough.
Step 3: First Rise
- Cover the bowl with a clean towel.
- Let rise at room temperature for 8–10 hours until doubled in size.
Step 4: Shape and Cold Ferment
- Turn dough onto a floured surface and gently shape into a ball.
- Place seam-side up in a floured bowl or basket.
- Cover and refrigerate for 1–24 hours (up to 48 hours for deeper flavor).
Step 5: Preheat Oven & Score
- Preheat oven to 450°F (232°C) with a Dutch oven inside.
- Remove dough from fridge; invert onto parchment paper seam-side down.
- Score top with a sharp blade.
Step 6: Bake
- Place dough with parchment into preheated Dutch oven.
- Cover and bake for 30 minutes.
- Uncover and bake another 15–20 minutes until golden brown.
Step 7: Cool & Slice
- Remove from Dutch oven and cool on wire rack for at least 1 hour before slicing.
With these steps followed closely, you’ll have an amazing Easy Roasted Garlic Rosemary Artisan Bread that’s sure to impress! Enjoy your baking!
How to Serve Easy Roasted Garlic Rosemary Artisan Bread – The Best Homemade Loaf
Easy Roasted Garlic Rosemary Artisan Bread is a versatile dish that can enhance any meal. Its crusty exterior and chewy texture make it perfect for various serving styles, whether as a side or a main feature.
With Olive Oil and Balsamic Vinegar
- Drizzle high-quality extra-virgin olive oil and balsamic vinegar over slices for a simple yet elegant appetizer.
As a Sandwich Base
- Use thick slices to create delicious sandwiches filled with your favorite meats, cheeses, and fresh veggies.
Pair with Soups
- Serve alongside hearty soups like minestrone or tomato basil for a comforting meal that warms the soul.
As Bruschetta
- Top toasted slices with diced tomatoes, basil, and mozzarella for a delightful bruschetta that bursts with flavor.
With Cheese Board
- Include the bread on a cheese board, pairing it with soft cheeses, nuts, and fruits for an appealing snack.
For Dipping
- Cut into cubes and serve with hummus or spinach dip for an easy-to-share appetizer at gatherings.
How to Perfect Easy Roasted Garlic Rosemary Artisan Bread – The Best Homemade Loaf
To achieve the best results with your Easy Roasted Garlic Rosemary Artisan Bread, consider these helpful tips. They will ensure your loaf turns out perfect every time.
- Use Fresh Ingredients – Fresh yeast, garlic, and herbs significantly enhance the flavor of your bread.
- Don’t Skip the Rise – Allowing the dough to rise properly develops its flavor and texture; always aim for 8–10 hours.
- Preheat Your Dutch Oven – A preheated Dutch oven creates steam that helps develop a crispy crust.
- Score Your Dough – Scoring allows the bread to expand while baking, resulting in a beautiful shape.
- Cool Before Slicing – Letting the bread cool completely ensures the inside sets properly and prevents sogginess.
- Experiment with Herbs – Feel free to add different herbs or spices to customize your loaf’s flavor profile.
Best Side Dishes for Easy Roasted Garlic Rosemary Artisan Bread – The Best Homemade Loaf
This artisan bread pairs beautifully with many dishes. Here are some excellent side options to complement your meal featuring Easy Roasted Garlic Rosemary Artisan Bread.
-
Classic Caesar Salad
A crisp salad with romaine lettuce, parmesan cheese, croutons, and Caesar dressing enhances your meal’s freshness. -
Creamy Tomato Soup
This rich soup pairs perfectly with artisan bread for dipping, adding comfort and warmth to your table. -
Roasted Vegetables
A medley of seasonal vegetables seasoned with herbs brings color and nutrition alongside the bread. -
Garlic Mashed Potatoes
Creamy mashed potatoes infused with garlic echo the flavors in your bread while providing indulgent comfort. -
Grilled Chicken Salad
Juicy grilled chicken over mixed greens is light yet satisfying when served with slices of artisan bread. -
Stuffed Peppers
Flavorful stuffed peppers filled with rice or quinoa make for a hearty option that complements the rustic loaf nicely. -
Chickpea Stew
A hearty chickpea stew provides protein and fiber while pairing wonderfully with the crusty slice of bread. -
Pasta Primavera
A colorful pasta dish loaded with fresh vegetables makes an excellent accompaniment to soak up all those delicious flavors from the bread.
Common Mistakes to Avoid
Making Easy Roasted Garlic Rosemary Artisan Bread can be simple, but there are common pitfalls to avoid for the best results.
- Skipping the Garlic Roasting: Not roasting the garlic can lead to a sharp flavor. Always roast it to bring out a sweet, mellow taste that elevates your bread.
- Ignoring Dough Temperature: Using water that’s too hot or too cold can affect yeast activation. Aim for room temperature water around 70°F (21°C) for optimal fermentation.
- Underestimating Rise Time: Rushing the first rise may result in dense bread. Allow the dough to rise until it has doubled in size for a light and airy loaf.
- Not Using Enough Flour for Dusting: Failing to dust your work surface adequately can cause sticking. Use enough flour to prevent this and ensure easy shaping of the dough.
- Cutting Cooling Time Short: Slicing bread right after baking can make it gummy inside. Wait at least one hour for cooling to achieve the perfect crust and texture.
Storage & Reheating Instructions
Refrigerator Storage
- Store your bread in an airtight container or wrap it tightly in plastic wrap.
- It can stay fresh for up to 3 days in the refrigerator.
Freezing Easy Roasted Garlic Rosemary Artisan Bread – The Best Homemade Loaf
- Slice the bread before freezing for easier access later.
- Wrap slices in plastic wrap and then place them in a freezer bag. They will last up to 3 months.
Reheating Easy Roasted Garlic Rosemary Artisan Bread – The Best Homemade Loaf
- Oven: Preheat to 350°F (175°C). Place slices directly on the rack for about 10 minutes until warm.
- Microwave: Use a microwave-safe plate and cover with a damp paper towel. Heat in short bursts of 10-15 seconds until warm.
- Stovetop: Heat slices in a skillet over medium heat, flipping once, until warmed through.
Frequently Asked Questions
If you have questions about making Easy Roasted Garlic Rosemary Artisan Bread, you’re not alone! Here are some common queries.
What makes Easy Roasted Garlic Rosemary Artisan Bread so special?
This artisan bread is unique due to its rich flavors from roasted garlic and fresh rosemary, creating an irresistible combination that enhances any meal.
Can I use regular garlic instead of roasted garlic?
Yes, but roasted garlic offers a sweeter and smoother flavor. If you use raw garlic, consider reducing the amount slightly to avoid overwhelming taste.
How do I know when my bread is fully baked?
The crust should be golden brown and sound hollow when tapped on the bottom. Using a thermometer, aim for an internal temperature of about 200°F (93°C).
What can I serve with Easy Roasted Garlic Rosemary Artisan Bread?
This bread pairs beautifully with soups, salads, or as a flavorful base for sandwiches. It also makes an excellent accompaniment to cheese platters.
Final Thoughts
Easy Roasted Garlic Rosemary Artisan Bread is not only delicious but also versatile enough for any occasion. You can customize it by adding different herbs or cheeses based on your preference. Give this recipe a try; you’ll love how simple it is to create your very own homemade loaf!
Easy Roasted Garlic Rosemary Artisan Bread – The Best Homemade Loaf
Easy Roasted Garlic Rosemary Artisan Bread – The Best Homemade Loaf is an irresistible, aromatic bread that combines the rich flavors of roasted garlic and fresh rosemary. This no-knead recipe allows even novice bakers to create a crusty exterior and a soft, chewy interior with minimal effort. Perfect for family gatherings, cozy dinners, or as a delicious standalone snack, this artisan loaf will elevate any meal. Serve it for a delightful dipping experience with olive oil and balsamic vinegar, or use it as a hearty base for sandwiches. With just a few simple ingredients and straightforward steps, you can impress your guests with this homemade treasure.
- Prep Time: 15 minutes
- Cook Time: 50 minutes
- Total Time: 1 hour 5 minutes
- Yield: Approx. 12 servings
- Category: Bread
- Method: Baking
- Cuisine: American
Ingredients
- 1 whole head garlic
- 1 tablespoon extra-virgin olive oil (divided)
- 1½ cups water (room temperature)
- 1 teaspoon active dry yeast
- 3 cups bread or all-purpose flour
- ½ teaspoon dried oregano
- 1 teaspoon kosher salt
- 2 teaspoons finely chopped fresh rosemary
Instructions
- Preheat your oven to 400°F (204°C) and roast the halved garlic drizzled with olive oil for about 40 minutes.
- In a small bowl, dissolve yeast in room-temperature water; let sit for 10–15 minutes.
- In a large bowl, combine flour, salt, oregano, and rosemary; add the yeast mixture and roasted garlic cloves.
- Mix until you achieve a sticky dough.
- Cover and let rise at room temperature for 8–10 hours until doubled in size.
- Shape into a ball and refrigerate for up to 24 hours.
- Preheat oven to 450°F (232°C), score the dough, then bake in a preheated Dutch oven covered for 30 minutes and uncovered for an additional 15–20 minutes until golden brown.
Nutrition
- Serving Size: 1 serving
- Calories: 150
- Sugar: 0g
- Sodium: 200mg
- Fat: 2g
- Saturated Fat: 0g
- Unsaturated Fat: 1g
- Trans Fat: 0g
- Carbohydrates: 29g
- Fiber: 1g
- Protein: 5g
- Cholesterol: 0mg