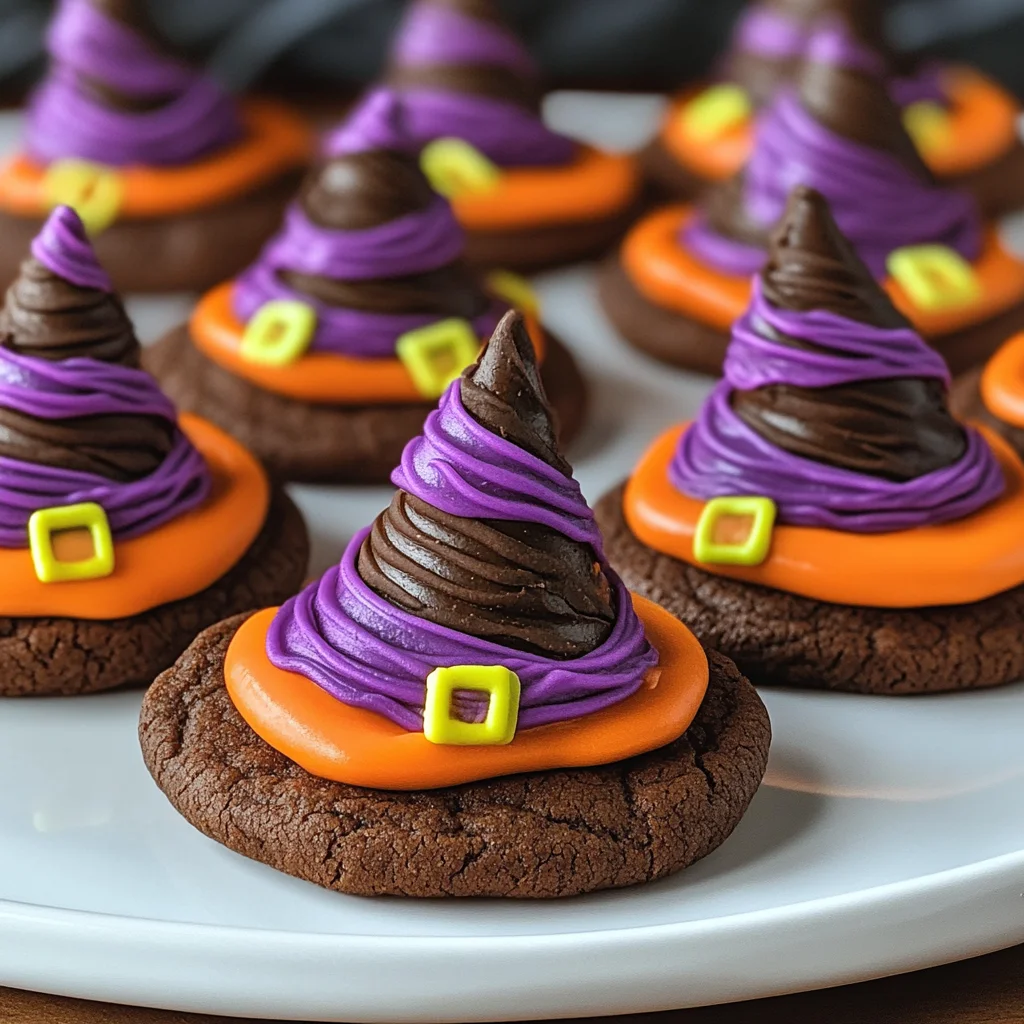
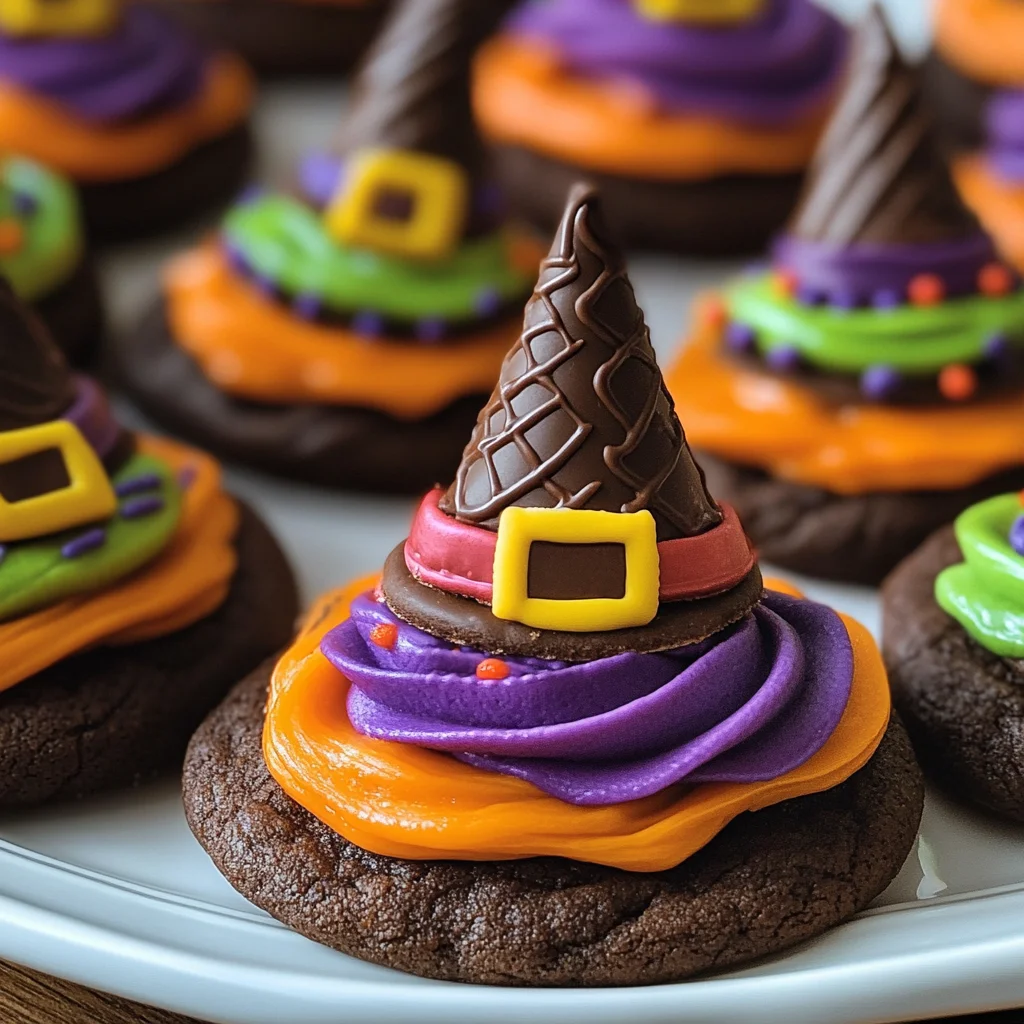
Halloween Witch Hat Cookies
These Halloween Witch Hat Cookies are a delightful treat that will enchant your guests at any Halloween gathering. With their fun and festive appearance, these cookies are not only perfect for parties but also an enjoyable activity to share with kids. The combination of chocolaty goodness and colorful icing makes them a standout dessert that will surely impress all the little ghouls and goblins.
Why You’ll Love This Recipe
- Fun for All Ages: Making these cookies is a great way to involve kids in the kitchen, allowing them to unleash their creativity.
- Versatile Designs: Customize with various icing colors and decorations to match your Halloween theme.
- Deliciously Chocolaty: These cookies offer rich chocolate flavor, making them a favorite among chocolate lovers.
- Simple Ingredients: With easy-to-find ingredients, you can whip up this treat without stress.
- Perfect for Parties: Their unique witch hat shape is sure to be a hit at any Halloween celebration.
Tools and Preparation
Before diving into this fun baking project, gather your tools. Having everything ready will make the process smooth and enjoyable.
Essential Tools and Equipment
- Cupcake Cones Baking Rack
- Baking Sheet
- Parchment Paper
- Decorating Bags
- Icing Tips (2B, 3)
- Mixing Bowls
- Knife or Spatula
Importance of Each Tool
- Cupcake Cones Baking Rack: This tool holds sugar cones securely while baking, ensuring even cake distribution inside each cone.
- Decorating Bags: These help you create beautiful designs with icing, allowing you to customize each cookie easily.
- Icing Tips: Different tips allow for varied designs; using tip 2B is perfect for piping smooth bands around the witch hats.
Ingredients
To create these delightful Halloween Witch Hat Cookies, gather the following ingredients:
For the Cake
- Favorite Cake Mix or Try Wilton’s Chocolate Cake Recipe
- Sugar Cones
For the Cookies
- Store Bought Chocolate Cookies or Try This Recipe from Wilton
For the Icing
- Lemon Yellow Icing Color
- Black Color Mist Food Coloring Spray
- Rose Icing Colors Pink Food Coloring
- Violet Icing Color, Gel Food Coloring
- Golden Yellow Icing Color
- Orange Icing Color
- Creamy White Decorator Icing, 4 lb. Tub
How to Make Halloween Witch Hat Cookies
Step 1: Prepare & Bake the Cones
- Prepare the cake mix according to your chosen recipe’s instructions.
- Place the Cupcake Cones Baking Rack on a baking sheet and insert sugar cones into it.
- Fill each cone with approximately 2 tablespoons of cake batter.
- Bake and cool the cones as per your recipe’s timing instructions.
Step 2: Spray the Cones
- If needed, trim any risen cake at the top of each cone using a knife.
- Position cones wide side down on parchment paper.
- Spray the cones with Black Color Mist and let them dry for about 10 to 15 minutes.
Step 3: Tint the Icing & Prepare the Bags
- Tint 1 cup of creamy white decorator icing orange.
- Combine violet and rose icing colors to tint another cup of creamy white decorator icing purple.
- Prepare two decorating bags with tip 2B; fill one with orange tinted icing and one with purple tinted icing.
- Simultaneously, tint ¼ cup of creamy white decorator icing yellow by mixing golden yellow and lemon yellow colors; place it in a decorator bag fitted with tip 3.
Step 4: Assemble the Witch Hats
- Pipe a small amount of orange icing onto the center of each cookie and place a cone on top.
- With tip facing outwards, pipe a band around half of the cones using orange icing; smooth it with a spatula if necessary.
- Repeat this process using purple icing on the remaining cookies and cones.
- Allow them to set for about 15 to 20 minutes before using yellow tinted icing (with tip 3) to pipe buckles around the bands on each hat.
- Let them set again for another 15 to 20 minutes before enjoying!
How to Serve Halloween Witch Hat Cookies
These Halloween Witch Hat Cookies are not just delightful in taste but also visually striking. Here are some fun and creative ways to serve them at your Halloween gatherings.
On a Festive Platter
- Arrange the cookies on a colorful platter surrounded by Halloween-themed decorations like mini pumpkins or fake spiders for added flair.
With Milk or Hot Chocolate
- Serve these cookies with a glass of cold milk or a warm cup of hot chocolate. The combination is perfect for indulging in sweet treats.
As Part of a Dessert Table
- Include the witch hat cookies on a larger dessert table filled with other Halloween goodies. This creates an inviting atmosphere for guests to explore.
Gift Boxes
- Package these cookies in clear gift boxes tied with orange and black ribbons. They make great party favors for guests to take home.
At a Kids’ Party
- Set up a decorating station where kids can customize their witch hat cookies with sprinkles, edible glitter, or additional icing colors.
Halloween Movie Night
- Pair these cookies with popcorn and candy during a spooky movie marathon. They’re the ideal sweet snack for thrilling films.
How to Perfect Halloween Witch Hat Cookies
For the best results when making your Halloween Witch Hat Cookies, consider these helpful tips.
- Use fresh ingredients – Ensure that your cake mix and icing are fresh for the best flavor and texture.
- Be precise with baking time – Follow the baking instructions closely to avoid overcooking or undercooking your cake cones.
- Practice piping techniques – If you’re new to decorating, practice piping icing on parchment paper before applying it to your cookies.
- Allow cooling time – Let the cones cool completely before decorating to prevent the icing from melting.
- Experiment with colors – Feel free to mix and match icing colors beyond orange and purple for unique witch hats.
- Store properly – Keep leftover cookies in an airtight container to maintain their freshness for several days.
Best Side Dishes for Halloween Witch Hat Cookies
Pairing side dishes with your delicious Halloween Witch Hat Cookies can elevate your dessert spread. Here are some great options:
- Pumpkin Soup – A warm and creamy pumpkin soup makes a comforting companion to sweet treats.
- Mummy Hot Dogs – Wrap hot dogs in crescent roll dough to create mummy figures, perfect for kids and adults alike.
- Witch’s Brew Punch – Create a refreshing punch using fruit juices and soda, garnished with floating gummy worms.
- Spooky Cheese Platter – Offer an assortment of cheeses alongside crackers shaped like bats or ghosts for a savory option.
- Vegetable Skeletons – Arrange fresh vegetables in skeletal shapes served with ranch dip, adding a healthy crunch.
- Candy Corn Fruit Cups – Layer pineapple chunks, orange segments, and whipped cream in clear cups resembling candy corn.
Common Mistakes to Avoid
When making Halloween Witch Hat Cookies, it’s easy to run into a few common pitfalls. Here are some mistakes to watch out for:
- Not measuring ingredients accurately – Use measuring cups and spoons for precise amounts. This ensures the right texture and flavor for your cookies.
- Ignoring cooling times – Allow cookies and cones to cool completely before decorating. This prevents icing from melting and losing shape.
- Skipping the drying step – Let the color mist spray dry before moving on. This helps the color adhere better and prevents smudging during assembly.
- Using too much icing – Be cautious with the amount of icing you use. Too much can cause messiness and make it hard to stack the cones securely.
- Neglecting decoration colors – Take time to tint your icing properly. Using vibrant colors makes your Halloween Witch Hat Cookies visually appealing.
Storage & Reheating Instructions
Refrigerator Storage
- Store cookies in an airtight container.
- They can last up to 5 days in the fridge.
Freezing Halloween Witch Hat Cookies
- Place cookies in a freezer-safe container or bag.
- They will keep well for up to 2 months.
Reheating Halloween Witch Hat Cookies
- Oven – Preheat oven to 350°F (175°C), place cookies on a baking sheet, and heat for about 5-7 minutes.
- Microwave – Heat individual cookies for about 10-15 seconds on medium power for a soft treat.
- Stovetop – Warm cookies briefly in a skillet over low heat, flipping carefully to avoid burning.
Frequently Asked Questions
Here are some common questions about making Halloween Witch Hat Cookies:
How can I customize my Halloween Witch Hat Cookies?
You can personalize these cookies by using different colors of icing or adding sprinkles for extra flair. Get creative with toppings!
Can I use homemade chocolate cookies instead of store-bought?
Yes! You can make your favorite chocolate cookie recipe at home instead of using store-bought options.
What is the best way to decorate these cookies?
Utilize piping bags with various tips for decoration. This allows you to create intricate designs that enhance the cookie’s appearance.
How long do these cookies stay fresh?
When stored correctly, Halloween Witch Hat Cookies can last up to 5 days in the refrigerator or up to 2 months in the freezer.
Final Thoughts
Halloween Witch Hat Cookies are not only delicious but also a delightful project to make with family and friends. With endless customization options, you can tailor them to suit your style. Try these fun treats this Halloween season!
Halloween Witch Hat Cookies

Get ready to enchant your guests with these delightful Halloween Witch Hat Cookies! These charming treats combine rich chocolate flavor with colorful icing, making them a standout dessert for any Halloween gathering. Perfect for kids and adults alike, this fun baking project not only results in visually striking cookies but also provides a wonderful opportunity for family bonding in the kitchen. With easy-to-follow instructions and simple ingredients, you can whip up a batch that’s sure to impress all the little ghouls and goblins at your party!
- Prep Time: 30 minutes
- Cook Time: 15 minutes
- Total Time: 45 minutes
- Yield: Approximately 12 cookies
- Category: Dessert
- Method: Baking
- Cuisine: American
Ingredients
- Cake mix (chocolate or your favorite)
- Sugar cones
- Store-bought chocolate cookies or homemade chocolate cookie recipe
- Colorful icing (orange, purple, yellow, black)
Instructions
- Preheat the oven and prepare cake mix as per instructions.
- Place sugar cones in a Cupcake Cones Baking Rack on a baking sheet and fill with batter. Bake until done.
- Once cooled, spray cones with black color mist and let dry.
- Tint icing in colors of your choice (orange, purple, yellow) and prepare decorating bags.
- Assemble by piping icing onto cookies and attaching cones.
- Decorate with additional icing for details.
Nutrition
- Serving Size: 1 cookie
- Calories: 150
- Sugar: 10g
- Sodium: 80mg
- Fat: 7g
- Saturated Fat: 3g
- Unsaturated Fat: 4g
- Trans Fat: 0g
- Carbohydrates: 20g
- Fiber: 1g
- Protein: 2g
- Cholesterol: 15mg