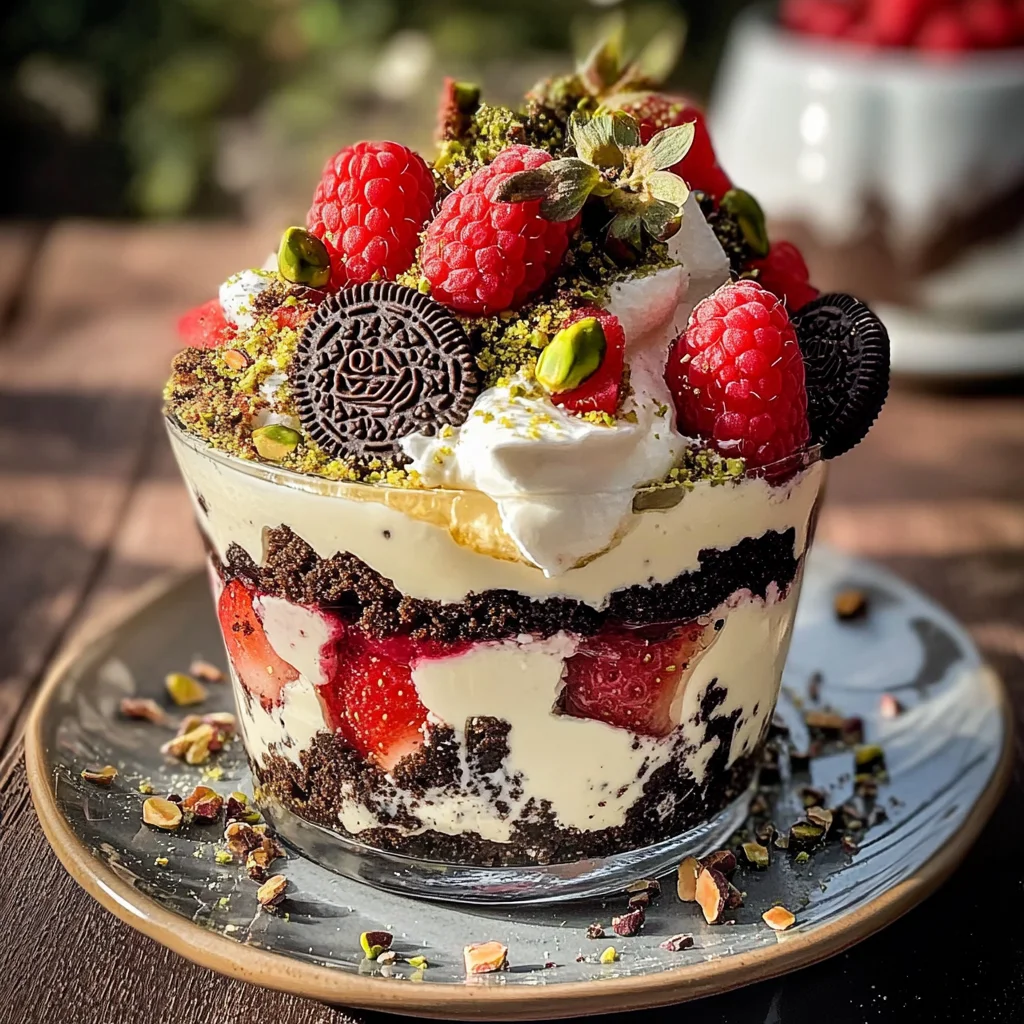
Wild Forest Classic Dirt Pudding Cake
Wild Forest Classic Dirt Pudding Cake is a delightful dessert that combines rich flavors with a fun, nature-inspired presentation. This cake is perfect for various occasions, from birthday parties to family gatherings. The playful layering of creamy pudding and crunchy Oreo crumbles will charm both kids and adults alike, making it a standout at any event.
Why You’ll Love This Recipe
- Easy to Make: With simple ingredients and straightforward steps, this recipe comes together quickly.
- Decadent Flavor: The combination of cream cheese, vanilla pudding, and whipped cream creates a luscious texture that melts in your mouth.
- Customizable: Feel free to mix in your favorite fruits or use different types of cookies for unique twists.
- Visually Appealing: The layered effect resembles a forest floor, complete with edible decorations that are sure to impress.
- Perfect for Sharing: This recipe yields 16 servings, making it ideal for parties or potlucks.
Tools and Preparation
Before you start making the Wild Forest Classic Dirt Pudding Cake, gather the right tools to ensure smooth preparation.
Essential Tools and Equipment
- Mixing bowls
- Stand mixer or hand mixer
- Food processor or rolling pin
- Measuring cups and spoons
- Serving dish (trifle dish or similar)
- Rubber spatula
Importance of Each Tool
- Stand Mixer or Hand Mixer: These tools make whipping cream and mixing ingredients effortless, ensuring a smooth texture.
- Food Processor: Perfect for crushing Oreos quickly and evenly, saving time during preparation.
- Rubber Spatula: Ideal for folding ingredients gently without deflating whipped cream or pudding.
Ingredients
For the Base
- 14 oz package of oreos
- 3 & 1/2 cups cold whole milk
- 2 3.4 oz boxes french vanilla pudding (or plain vanilla/chocolate)
For the Creamy Filling
- 8 oz cream cheese (softened)
- 1 cup heavy whipping cream (or cool whip)
- 3/4 cup powdered sugar
- 1 tsp vanilla extract (or vanilla bean)
For the Toppings
- 1 lb fresh strawberries
- 1/4-1/2 cup fresh raspberries
- Pretzel sticks
- Mini vegan marshmallows
- 4-6oz white chocolate
- 2 tsp coconut oil (for melting)
- Crushed pistachios for moss in dirt & rocks
How to Make Wild Forest Classic Dirt Pudding Cake
Step 1: Prepare the Pudding & Crush Oreos
- In a large bowl, whisk together the cold milk and instant pudding mix. Set aside to thicken.
- Add the Oreo package to a food processor and pulse until they are crushed into a coarse crumb. Alternatively, place the Oreos in a large ziplock bag, seal it, and crush them with a rolling pin.
Step 2: Make the Whipped Cream
- In another large bowl, use a hand mixer or stand mixer with a whisk attachment to whip the heavy cream until soft peaks form.
- Gently fold in the vanilla extract. Set aside without cleaning the bowl.
Step 3: Whip Cream Cheese & Finish Pudding
- In the same bowl used for whipping cream, beat the softened cream cheese until creamy.
- Add powdered sugar and mix until smooth.
- Incorporate the thickened pudding into the cream cheese mixture on medium speed until fully combined.
- Carefully fold in the whipped cream using a rubber spatula to keep it airy.
Step 4: Assemble Dirt Pudding Cake
- Choose your serving dish—an 8 or 9-inch round dish works well.
- Layer half of the crushed Oreos at the bottom of your dish.
- Spread half of your creamy filling over the Oreos.
- Repeat with another layer of Oreos followed by filling until you reach the top of your dish.
- Finish by covering the top with remaining crushed Oreos for that dirt look.
Enjoy your Wild Forest Classic Dirt Pudding Cake at your next gathering!
How to Serve Wild Forest Classic Dirt Pudding Cake
Serving Wild Forest Classic Dirt Pudding Cake is a delightful experience that can be enhanced with a few creative touches. This dessert is not only visually appealing but also versatile in presentation. Here are some serving suggestions to elevate your dessert experience.
Individual Cups
- Use small clear cups or jars to serve individual portions of the dirt pudding cake for a charming presentation.
Layered Trifle
- Create layers of crushed Oreos, pudding mix, and whipped cream in a large trifle dish for a stunning centerpiece.
With Fresh Berries
- Top each serving with fresh strawberries and raspberries for added flavor and visual appeal.
Garnished with Mint
- Add a sprig of fresh mint on top for a refreshing touch and contrast in color.
Fun Toppings
- Let guests choose their favorite toppings like mini vegan marshmallows or crushed pistachios for personalization.
Themed Parties
- Serve at nature-themed parties alongside other desserts like chocolate-covered strawberries to match the forest vibe.
How to Perfect Wild Forest Classic Dirt Pudding Cake
Perfecting your Wild Forest Classic Dirt Pudding Cake ensures it delights everyone at the table. Here are some essential tips to achieve that perfect texture and flavor.
-
Chill the Layers: Allow the pudding mixture to chill in the refrigerator before assembling. This helps set the layers nicely.
-
Use a Variety of Oreos: Experiment with different flavors of Oreos for unique taste combinations, such as mint or peanut butter.
-
Adjust Sweetness: Taste the cream cheese mixture before adding all the powdered sugar. Adjust based on your preferred sweetness level.
-
Layer Thoughtfully: Alternate layers carefully; start with Oreos, then pudding, ensuring even distribution for beautiful slices.
-
Add Texture: Incorporate chopped nuts or crunchy toppings between layers for added texture and surprise in each bite.
Best Side Dishes for Wild Forest Classic Dirt Pudding Cake
Pairing side dishes with your Wild Forest Classic Dirt Pudding Cake can create a well-rounded dessert table. Consider these complementary options to enhance your dessert experience.
-
Fruit Salad
A light fruit salad provides freshness that balances the richness of the dirt pudding cake. -
Cheesecake Bites
Mini cheesecake bites offer a creamy contrast that pairs beautifully with the cake’s chocolatey flavor. -
Chocolate-Covered Strawberries
These sweet treats echo the berry topping on your cake while adding elegance to your dessert spread. -
Vanilla Ice Cream
A scoop of vanilla ice cream creates a delightful temperature contrast against the chilled dirt pudding cake. -
Granola Parfaits
Layered granola parfaits add crunch and healthiness to your dessert table while complementing the chocolate tones. -
Mini Cupcakes
Light mini cupcakes can provide variety and keep guests satisfied without overwhelming them after rich dirt pudding cake. -
Cookies Platter
A platter of assorted cookies offers additional sweetness and variety, making it easy for guests to indulge further. -
Nut Butter Dip with Apples
This refreshing option adds a healthy element while providing a nice contrast to the flavors of the dirt pudding cake.
Common Mistakes to Avoid
When making Wild Forest Classic Dirt Pudding Cake, a few common mistakes can affect the final result. Here’s how to avoid them.
- Skipping the Whipping Cream Step: Not whipping the cream properly can lead to a dense texture. Make sure you whip until soft peaks form for that light, airy consistency.
- Not Letting the Pudding Set: Rushing this step can cause the pudding to be runny. Allow it to thicken fully before mixing with other ingredients.
- Using Warm Ingredients: Mixing warm or unchilled ingredients can ruin the texture. Ensure all components are cold, especially when working with whipped cream.
- Overmixing the Cream Cheese: Overmixing can make your mixture too thin. Beat just until smooth and creamy, then fold in whipped cream gently for best results.
- Neglecting Layering Technique: Poor layering can lead to uneven flavors. Layer ingredients carefully, starting with Oreos, then filling, and repeat until filled.
Storage & Reheating Instructions
Refrigerator Storage
- Store in an airtight container in the refrigerator.
- Can be kept for up to 3 days without losing quality.
Freezing Wild Forest Classic Dirt Pudding Cake
- Wrap tightly in plastic wrap and then in aluminum foil.
- Will last for about 1 month in the freezer for best taste.
Reheating Wild Forest Classic Dirt Pudding Cake
- Oven: Preheat to 300°F (150°C). Cover with foil and heat for about 10-15 minutes until warmed through.
- Microwave: Place a slice on a microwave-safe plate and heat for about 20-30 seconds. Check frequently to avoid overheating.
- Stovetop: Use a non-stick skillet over low heat. Cover with a lid and warm gently, checking often.
Frequently Asked Questions
Here are some common questions about making Wild Forest Classic Dirt Pudding Cake.
What is Wild Forest Classic Dirt Pudding Cake?
Wild Forest Classic Dirt Pudding Cake is a layered dessert featuring crushed Oreos and creamy pudding, topped with fresh fruits and garnishes that resemble dirt and foliage.
How long does it take to make Wild Forest Classic Dirt Pudding Cake?
The total time required is approximately 40 minutes, not including chilling time needed for best results.
Can I customize the fruit toppings?
Absolutely! You can use a variety of berries or even add nuts for crunch. Feel free to experiment based on your preferences!
Is there a dairy-free option available?
Yes, you can substitute cream cheese with dairy-free alternatives and use coconut cream instead of heavy whipping cream for a delicious dairy-free version.
Final Thoughts
Wild Forest Classic Dirt Pudding Cake is not only visually appealing but also versatile in flavor combinations. This dessert is perfect for gatherings or just a cozy night at home. Try customizing it with your favorite fruits or toppings to make it uniquely yours!
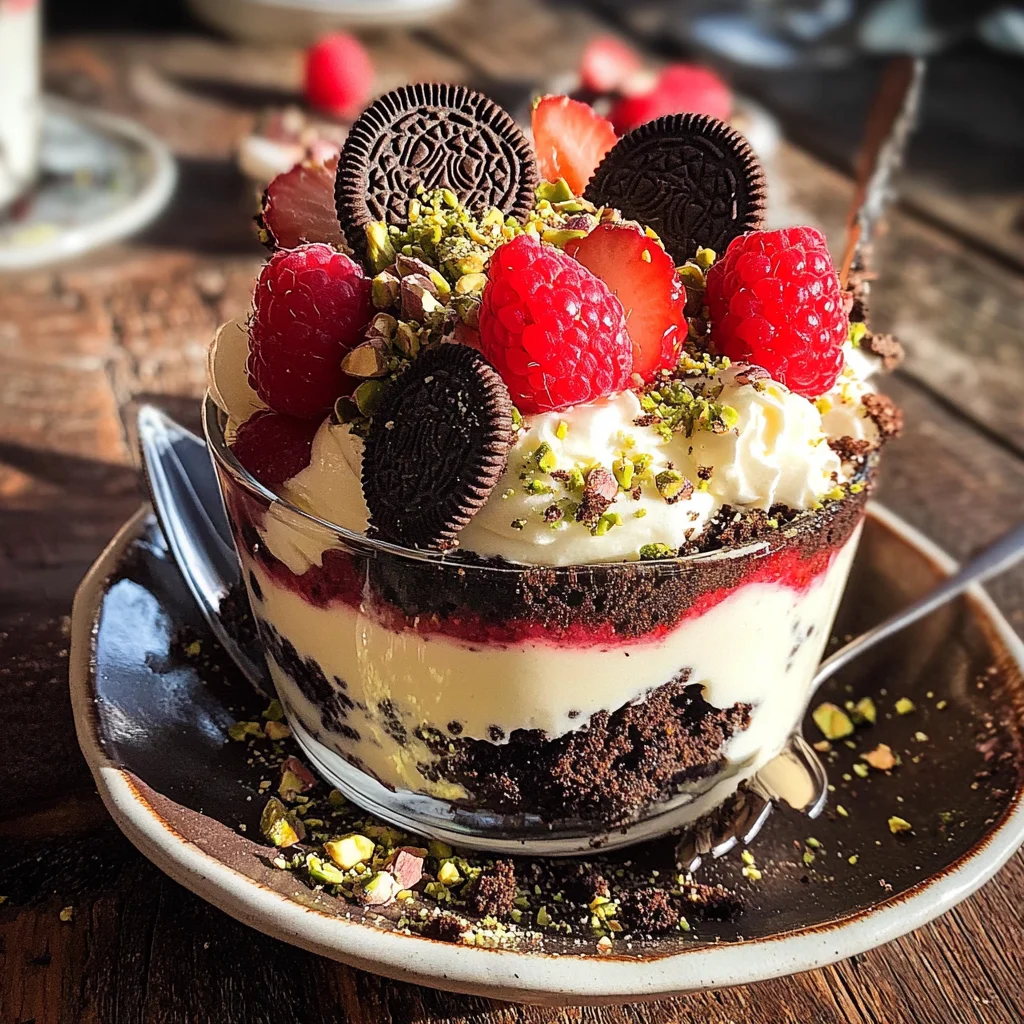
Wild Forest Classic Dirt Pudding Cake

Wild Forest Classic Dirt Pudding Cake is a delightful and whimsical dessert that brings a taste of the forest to your table. This layered treat features creamy vanilla pudding combined with rich cream cheese and airy whipped cream, all nestled between crunchy layers of crushed Oreos. Adorned with fresh strawberries and raspberries, along with fun edible decorations, this cake is perfect for parties, family gatherings, or simply indulging your sweet tooth. Its easy preparation makes it accessible for bakers of all levels, and its playful presentation will charm guests of all ages. Let your creativity shine by customizing the layers with favorite fruits or cookie varieties!
- Prep Time: 20 minutes
- Cook Time: None
- Total Time: 0 hours
- Yield: Serves approximately 16 1x
- Category: Dessert
- Method: No-Bake
- Cuisine: American
Ingredients
- 14 oz package of Oreos
- 3 & 1/2 cups cold whole milk
- 2 boxes (3.4 oz each) French vanilla pudding
- 8 oz cream cheese (softened)
- 1 cup heavy whipping cream
- 3/4 cup powdered sugar
- 1 lb fresh strawberries
- 1/4–1/2 cup fresh raspberries
- Crushed pistachios for garnish
Instructions
- In a large bowl, whisk together cold milk and instant pudding mix; let it thicken.
- Crush Oreos using a food processor or rolling pin until crumbly.
- In another bowl, whip heavy cream until soft peaks form; fold in vanilla extract.
- Beat softened cream cheese until smooth; mix in powdered sugar and thickened pudding. Fold in whipped cream until well combined.
- In a serving dish, layer half of the crushed Oreos followed by half of the creamy filling; repeat layers ending with Oreos on top.
Nutrition
- Serving Size: 1 slice (approximately 100g)
- Calories: 320
- Sugar: 25g
- Sodium: 210mg
- Fat: 18g
- Saturated Fat: 10g
- Unsaturated Fat: 6g
- Trans Fat: 0g
- Carbohydrates: 37g
- Fiber: 2g
- Protein: 4g
- Cholesterol: 30mg